Instructions and tips for self-injecting the MENOGON® HP ready-to-use pen
Instructions for use
Dear patient, These instructions will help you to use the MENOGON® HP ready-to-use pen correctly so that you can then inject the medicine in the best possible way. Please note the following information:
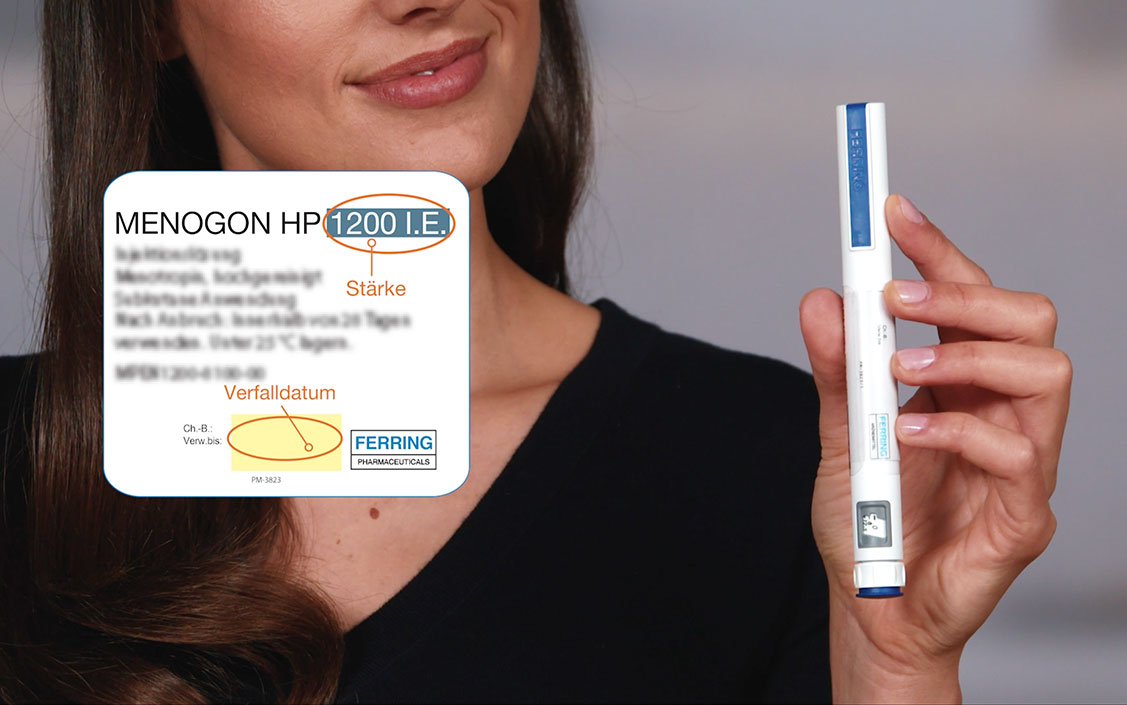
The MENOGON® HP ready-to-use pen must be stored in the refrigerator at 2 – 8° C until use and must not be frozen.
Following the first application, the MENOGON® HP ready-to-use pen can be stored at room temperature (not above 25° C) for up to 28 days.
The MENOGON® HP ready-to-use pen and the needles should only be used by the same person and not by multiple people.
If you are blind or visually impaired, do not use this pen without assistance. Get help from a person with good eyesight who is trained in the use of the ready-to-use pen.
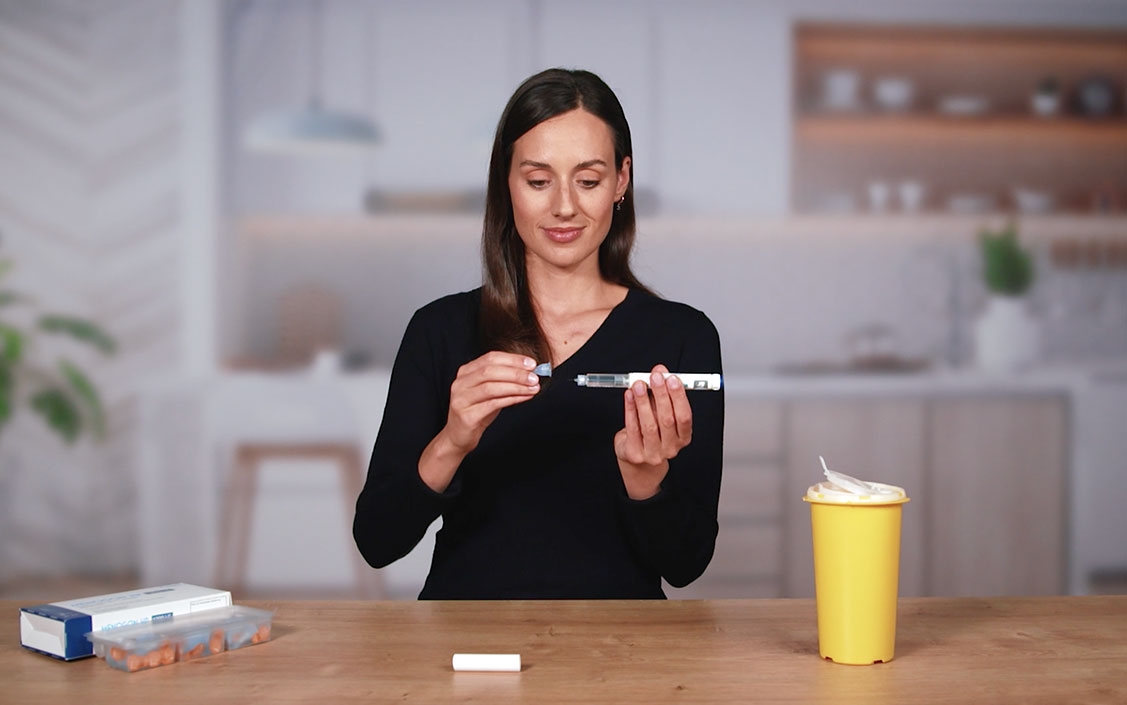
Before starting, please ensure that you have a clean surface and place all the necessary materials within easy reach.
If you have any questions about MENOGON® HP ready-to-use pen, contact your doctor or pharmacist or the marketing authorisation holder.
Use only the disposable needles (“click-on” needles) supplied with the ready-to-use pen.
Remove the pen cap.
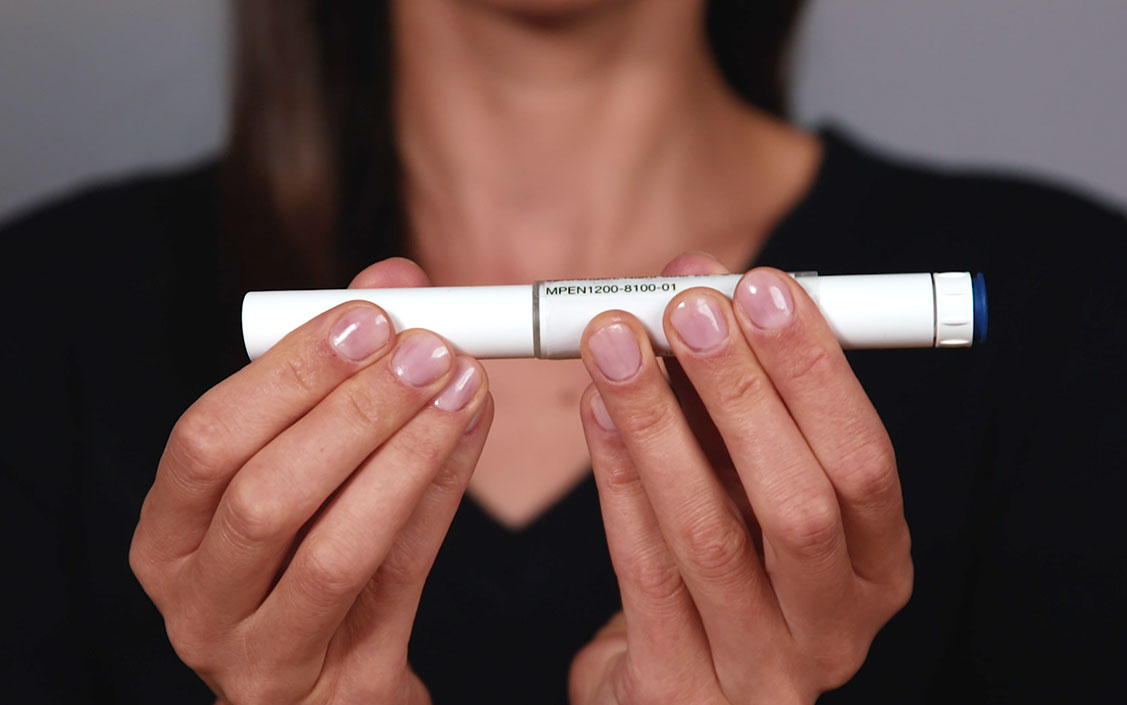
Check that the ready-to-use pen is not damaged.
Check that the solution in the ready-to-use pen is clear and does not contain any suspended matter.
Do not use the ready-to-use pen if it is damaged or if the solution in the ready-to-use pen is not clear or contains suspended matter.
Remove the protective film from the needle.
Now put the needle on the ready-to-use pen. You will hear or feel a click when the needle is securely attached.
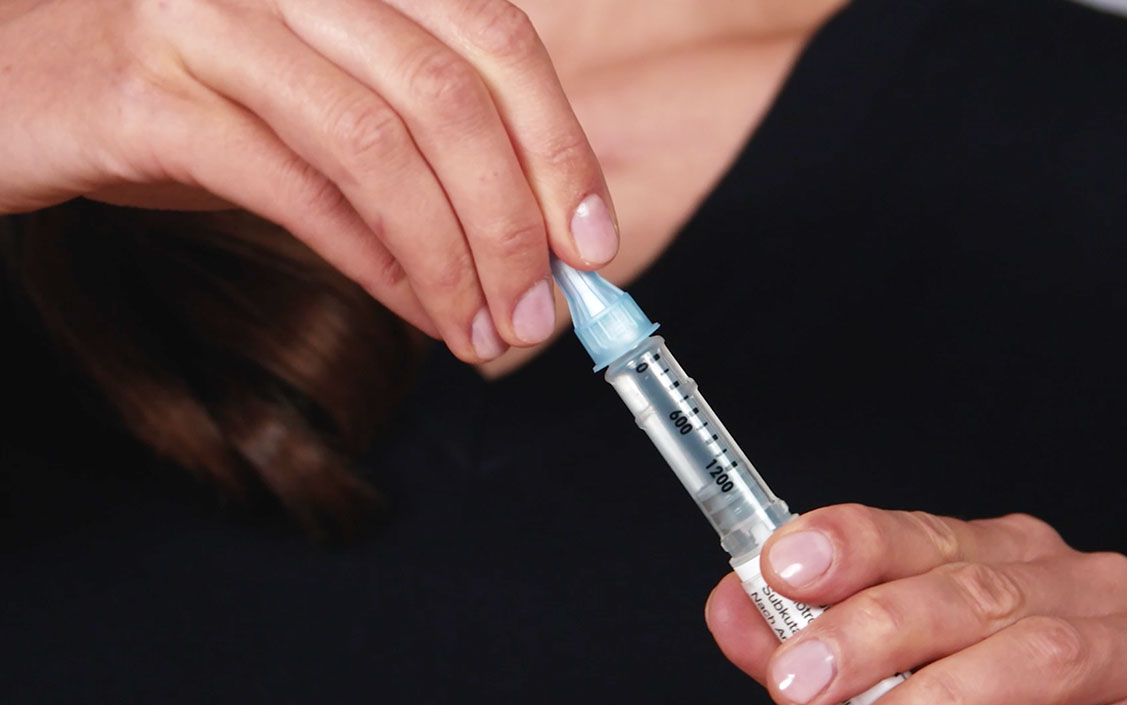
Pull off the outer needle protection cap. Do not throw away the outer needle protection cap. You will need this to dispose of the needle after injecting the medicine.
Pull off the inner needle protection cap and discard it.
Before using the ready-to-use pen for the first time, you must remove the air bubbles from the cartridge to get the correct dose of medicine.
You only need to bleed the ready-to-use pen when you use it for the first time. Follow the steps even if you do not see any air bubbles.
If the ready-to-use pen has already been used, proceed directly to the next step.
Turn the dosage ring clockwise until a drop symbol appears in the dosage window and is level with the dosage indicator.
If you have incorrectly set the dosage to bleed the ready-to-use pen, you can adjust it up or down without loss of medicine. To do this, turn the dosage ring in one of the two directions until the drop symbol appears in the dosage window and is level with the dosage indicator.
Hold the ready-to-use pen with the needle pointing upwards. Tap your finger against the cartridge holder so that all air bubbles in the cartridge rise to the top.
Continue to hold the needle upwards (away from the face) and push the injection button in all the way until the number “0” appears in the dosage window and is level with the dosage indicator.
Check to see if there is a drop of liquid at the tip of the needle.
If no drop appears, repeat the “Performing an air bleed on the ready-to-use pen” step until a drop appears.
If no drop appears after 5 attempts, remove the needle, put on a new needle and repeat the process.
If you still do not see a drop after using a new needle, use a new ready-to-use pen.
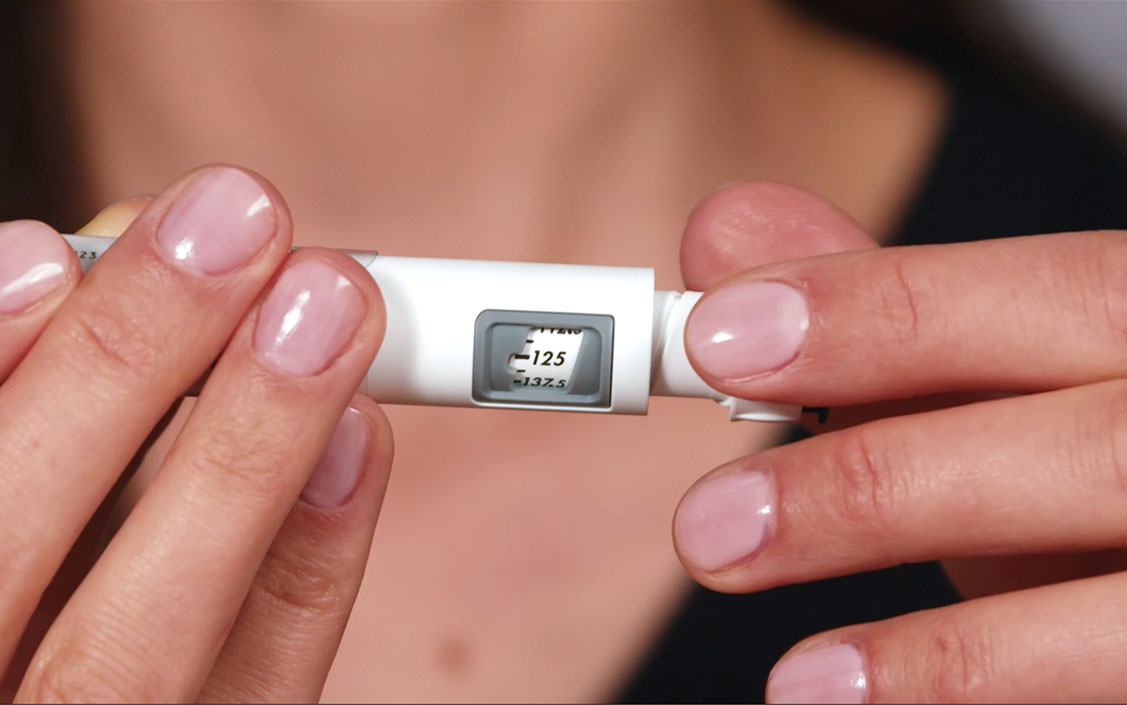
Turn the dosage ring clockwise until the prescribed dose appears in the dosage window and is level with the dosage indicator.
The dose can be adjusted up or down without loss of medicine by turning the dosage ring in either direction until the correct dose appears in the dosage window and is level with the dosage indicator.
You may need more than one ready-to-use pen to fully inject yourself with your prescribed dose.
This medicine is injected directly under the skin (subcutaneously) in the abdomen. Choose a new injection site for each injection to reduce the risk of skin reactions such as redness and irritation. Do not inject into an area that is sore (tender), injured, reddened, hardened or scarred or where you have stretch marks.
Hold the ready-to-use pen so that the dosage window is visible to you while injecting.
Squeeze the skin and insert the needle straight into the skin as your doctor has shown you.
Do not touch the injection button yet.
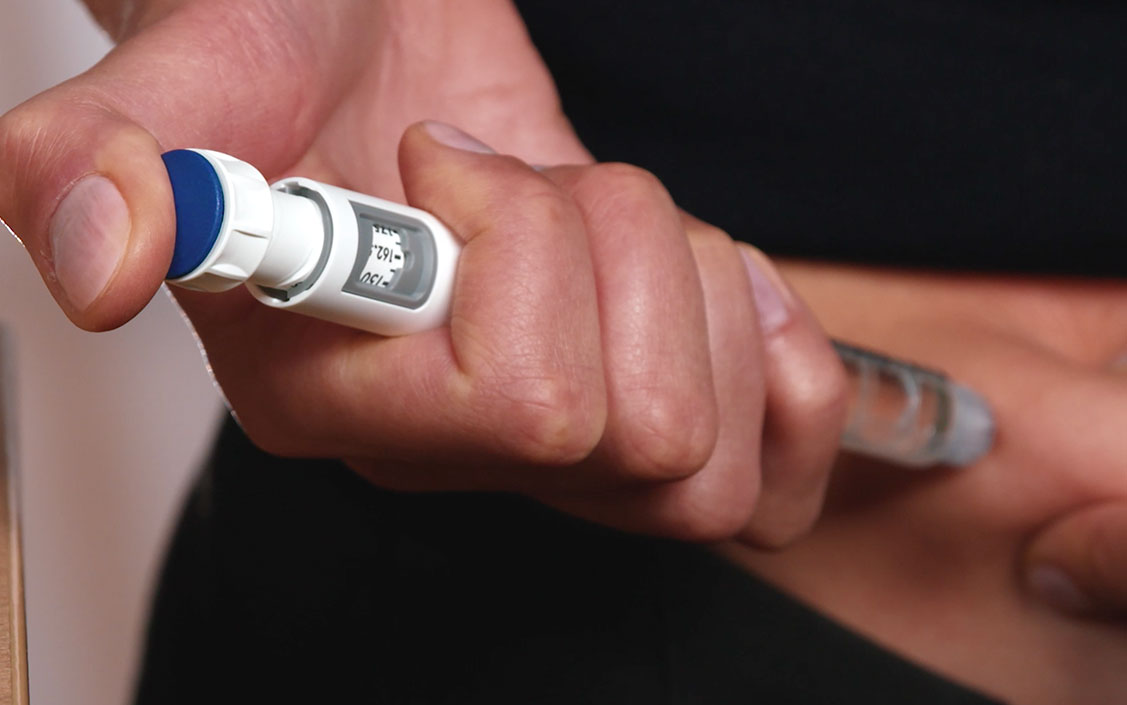
After you have inserted the needle, place your thumb on the injection button.
Push the injection button in as far as it will go and hold it.
Continue to hold down the injection button.
When the number “0” appears in the dosage window and is level with the dosage indicator, wait 8 seconds (count slowly to 8). This will ensure that you receive the full dose.
After holding down the injection button for 8 seconds, release it.
Slowly remove the needle from the injection site by pulling it straight out of the skin.
If blood comes out at the injection site, press lightly on the injection site with gauze or cotton wool.
Do not hold the ready-to-use pen at an angle during injection or withdrawal.
If you hold the ready-to-use pen at an angle, the needle may bend or break off.
If a broken needle gets stuck in the body or remains under the skin, seek medical help immediately.
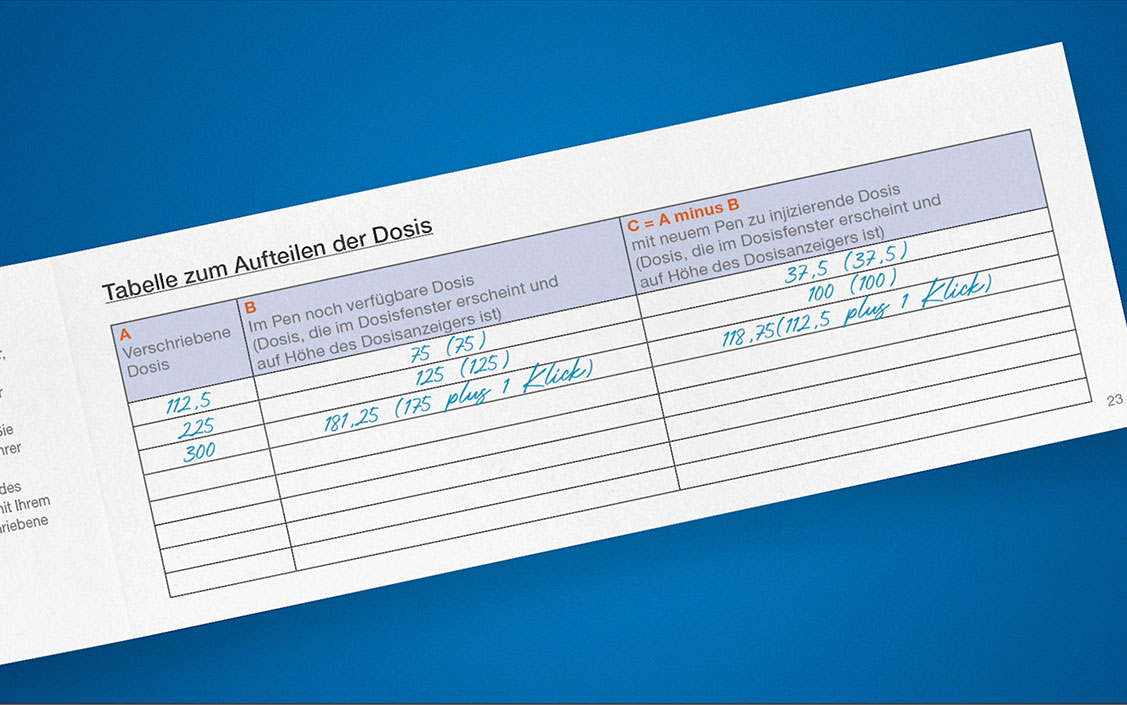
If you cannot set the full dose, there is not enough medicine left in the ready-to-use pen. Either divide the dose into several injections or dispose of the old ready-to-use pen and use a new ready-to-use pen for your injection.
You may need more than one ready-to-use pen to fully inject yourself with your prescribed dose.
Make a note of the dosage remaining in the ready-to-use pen before injecting. Then take a new ready-to-use pen and bleed it as described before. Now select the dosage still to be injected and inject the remaining dosage of the medicine.
Instructions and tips for self-injecting the MENOGON® HP ready-to-use pen
Instructions for use
Dear patient, These instructions will help you to use the MENOGON® HP ready-to-use pen correctly so that you can then inject the medicine in the best possible way. Please note the following information:
The MENOGON® HP ready-to-use pen must be stored in the refrigerator at 2 – 8° C until use and must not be frozen.
Following the first application, the MENOGON® HP ready-to-use pen can be stored at room temperature (not above 25° C) for up to 28 days.
The MENOGON® HP ready-to-use pen and the needles should only be used by the same person and not by multiple people.
If you are blind or visually impaired, do not use this pen without assistance. Get help from a person with good eyesight who is trained in the use of the ready-to-use pen.
Before starting, please ensure that you have a clean surface and place all the necessary materials within easy reach.
If you have any questions about MENOGON® HP ready-to-use pen, contact your doctor or pharmacist or the marketing authorisation holder.
Use only the disposable needles (“click-on” needles) supplied with the ready-to-use pen.
Remove the pen cap.
Check that the ready-to-use pen is not damaged.
Check that the solution in the ready-to-use pen is clear and does not contain any suspended matter.
Do not use the ready-to-use pen if it is damaged or if the solution in the ready-to-use pen is not clear or contains suspended matter.
Remove the protective film from the needle.
Now put the needle on the ready-to-use pen. You will hear or feel a click when the needle is securely attached.
Pull off the outer needle protection cap. Do not throw away the outer needle protection cap. You will need this to dispose of the needle after injecting the medicine.
Pull off the inner needle protection cap and discard it.
Before using the ready-to-use pen for the first time, you must remove the air bubbles from the cartridge to get the correct dose of medicine.
You only need to bleed the ready-to-use pen when you use it for the first time. Follow the steps even if you do not see any air bubbles.
If the ready-to-use pen has already been used, proceed directly to the next step.
Turn the dosage ring clockwise until a drop symbol appears in the dosage window and is level with the dosage indicator.
If you have incorrectly set the dosage to bleed the ready-to-use pen, you can adjust it up or down without loss of medicine. To do this, turn the dosage ring in one of the two directions until the drop symbol appears in the dosage window and is level with the dosage indicator.
Hold the ready-to-use pen with the needle pointing upwards. Tap your finger against the cartridge holder so that all air bubbles in the cartridge rise to the top.
Continue to hold the needle upwards (away from the face) and push the injection button in all the way until the number “0” appears in the dosage window and is level with the dosage indicator.
Check to see if there is a drop of liquid at the tip of the needle.
If no drop appears, repeat the “Performing an air bleed on the ready-to-use pen” step until a drop appears.
If no drop appears after 5 attempts, remove the needle, put on a new needle and repeat the process.
If you still do not see a drop after using a new needle, use a new ready-to-use pen.
Turn the dosage ring clockwise until the prescribed dose appears in the dosage window and is level with the dosage indicator.
The dose can be adjusted up or down without loss of medicine by turning the dosage ring in either direction until the correct dose appears in the dosage window and is level with the dosage indicator.
You may need more than one ready-to-use pen to fully inject yourself with your prescribed dose.
This medicine is injected directly under the skin (subcutaneously) in the abdomen. Choose a new injection site for each injection to reduce the risk of skin reactions such as redness and irritation. Do not inject into an area that is sore (tender), injured, reddened, hardened or scarred or where you have stretch marks.
Hold the ready-to-use pen so that the dosage window is visible to you while injecting.
Squeeze the skin and insert the needle straight into the skin as your doctor has shown you.
Do not touch the injection button yet.
After you have inserted the needle, place your thumb on the injection button.
Push the injection button in as far as it will go and hold it.
Continue to hold down the injection button.
When the number “0” appears in the dosage window and is level with the dosage indicator, wait 8 seconds (count slowly to 8). This will ensure that you receive the full dose.
After holding down the injection button for 8 seconds, release it.
Slowly remove the needle from the injection site by pulling it straight out of the skin.
If blood comes out at the injection site, press lightly on the injection site with gauze or cotton wool.
Do not hold the ready-to-use pen at an angle during injection or withdrawal.
If you hold the ready-to-use pen at an angle, the needle may bend or break off.
If a broken needle gets stuck in the body or remains under the skin, seek medical help immediately.
If you cannot set the full dose, there is not enough medicine left in the ready-to-use pen. Either divide the dose into several injections or dispose of the old ready-to-use pen and use a new ready-to-use pen for your injection.
You may need more than one ready-to-use pen to fully inject yourself with your prescribed dose.
Make a note of the dosage remaining in the ready-to-use pen before injecting. Then take a new ready-to-use pen and bleed it as described before. Now select the dosage still to be injected and inject the remaining dosage of the medicine.